Billing Page
Clicking on your name on the upper right corner and selecting Billing tab shows the Billing page. On this page, you can register information required for paying fees for Strix Cloud.
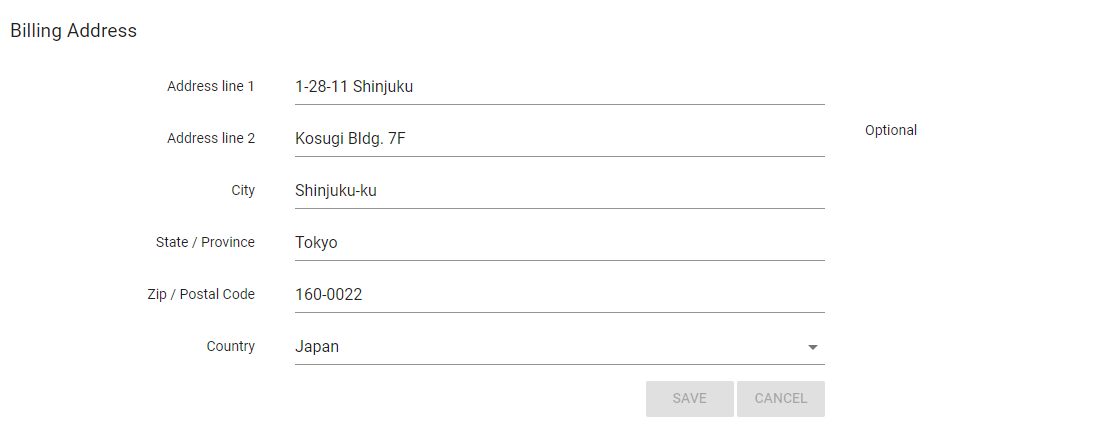
Billing Address

Register the billing address of your credit card here. You must enter the address that you register to the issuing bank of your credit card.
You should choose Country from the dropdown. Address elements other than Country should be written either in English or Japanese.
Register Credit Card

If you have not registered any credit card, you will see Register Credit Card below Billing Address. You can register your credit card by filling your card information for paying fees for Strix Cloud. Register one by entering your card number, expiration date (month and year), and CVV, and clicking on Register.
Note
The cardholder name of the credit card you are registering must match with the name registered on Profile.
Note
You need to register your billing address before you register your credit card.
Note
CVV is a code written on your credit card, and it is on a different location on a different card. Most typically it is written on its signature strip on the back, as three digits alone, three digits after the card number, or three digits after the last part of your card number, but it may also be written on its front to the right of the card number as four digits.
Whatever its format is, enter the CVV code consisting of three or four digits only.
If you are not sure where on your card you can find the card’s CVV, please ask the issuing bank. Your bank may call the CVV in another name, such as CVC, CVD, CSC, CID, or security code.
Note
You will not be charged only by registering your credit card. You will be charged only if you use a paid instance or your bandwidth exceeds the monthly limit of 60GB, and the charge will take place on the next month.
Credit card information

After registering you credit card, the lower part of the page changes to Credit Card. The block shows the brand, a part of the card number, and the expiration date of your credit card, so that you can remember which card you have registered. You can’t see other information on your credit card for security reasons, even if it is your own card.
You can change a credit card to be used for payment by clicking on Edit button, entering Card Number, Expiration dates (Month and Year), and CVV, and clicking on Update. Even in a case such as you are updating the card information to a new card of the same number with a different expiration date, not just the new expiration date, but you also need to enter the full card number and CVV again.
You can stop changing your card by clicking on Cancel.
Removing your credit card information
Click on the Remove button to the right of the credit card information to undo the credit card registration and remove your card information from Strix Cloud. If you remove your credit card information, you will be unable to use paid server instances.
Note
Removing the credit card information deletes all of your paid server instances. It usually results in removal of applications, and you will loose your Application ID, master hostname, and other configuration information. Please be very careful when removing.